Sunday, July 26, 2009

Modeling by 3d max (FOOTBALL)

It’s very easy to model foot ball in 3d max to understand the modeling of football we got to understand following points which are

(1) Go to extended privities and create hydra from front
(2) GO to hydra parameters and check into dodec/icon
(3) Go to family parameters of hydra and assign value of p=.3
(4) Then convert hydra in to editable poly
(5) In editable poly select polygon
(6) Select all polygon of hydra
(7) Then extrude polygon and in extrude window check by polygon
(8) Extrude value is 4
(9) Then go to bevel and check by polygon
(10) Bevel value is height value is 1.54 and outline amount is -2.01
(11) Now go to modifier list and select mesh smooth and iteration of mesh smooth is zero
By following process our project of football is completed as u see in picture

Monday, July 6, 2009

Basic Modeling [ Part - 15 ]

Open the material window
Click on the diffuse map button then select the Bitmap option
Pick the jpg like this and open the coordinate’s palette and use the following setting


Basic Modeling [ Part - 14 ]

Create a Chamfer cylinder with the following settings
Radius: 2.7, Height: 4.6 Fillet: 2.0
Set like this in the front view


Basic Modeling [ Part - 13 ]

Create a cylinder with the following settings
Radius: 1.0, Height: 3
Set like this in the front view


Basic Modeling [ Part - 12 ]

Create a Sphere with the following settings
Radius: 4.6, Segment: 48
Hemisphere 0.565
Select Chop mode
Set like this in the front view


Basic Modeling [ Part - 11 ]

Now apply the Turbo Smooth Modifier
Set the Illustration: 1
Your object should like this


Basic Modeling [ Part - 10 ]

Your object should like this in the front view


Sunday, July 5, 2009

Basic Modeling [ Part - 9 ]

Now click on the Extrude button and you will see the Extrude polygon pallete is openSet the Extrusion Height: 1Select the Local Normal mode then hit OK

Basic Modeling [ Part - 8 ]

-Now convert into the Editable Poly and select the Polygon modeThen make a selection like this


Basic Modeling [ Part - 7 ]

Now click on the cylinder buttonCreate a cylinder with the following settingsRadius: 4.0, Height: 188Create Cylinder in the left view.


Basic Modeling [ Part - 6 ]

Open the scatter parameter and use the following settingYour image should like this


Basic Modeling [ Part - 5 ]

Now your object should like this:

Basic Modeling [ Part - 4 ]

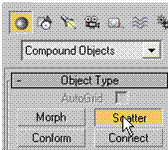
Now click on the Scatter button > Pick Distribution ObjectThen click on the Sphere like this


Basic Modeling [ Part - 3 ]

Create a Cone with the following settings :
Radius 1: 2.8, Radius: 00: Height: 15
Create Cone in the top view
Set like this in the front view:

Basic Modeling [ Part - 2 ]

Create a Sphere with the following settings
Radius: 22, Segment: 48 , Create Sphere in the top


Basic Modeling [ Part - 1 ]

Here I will tell you about 3dsmax 3dmodel 3d mace studio tutorial.I have used following techniques in this 3ds max tutorial.Editable poly and Scatter techniques[1]-First of all you will press (ctrl +N) now you will see the new window is openNow click on the Geometry > Standard primitives > Plane. Use the following Setting creates a plane like thisIn the top view and set like this in the perspective view.